How to Make a YouTube Channel in 2026, Step by Step
Setting up the channel itself takes ten minutes. Getting the details right, the account type, the channel art sizes, the first video's settings, is what decides whether anyone sticks around. Here's the full walkthrough for desktop, mobile, and the option that skips filming altogether.

How to make a YouTube channel comes down to five steps: sign into a Google Account, create the channel itself (personal or Brand Account), add a profile picture and banner, verify your phone number, then publish a first video. None of it costs anything, and the setup itself is done in under ten minutes once you know which screen to click through. The part most new creators skip past is everything that happens between "channel created" and "first video live," which is where most of this guide lives.
This walkthrough covers the exact steps for desktop and for the mobile app, the channel art sizes you need ready before you touch the banner uploader, and the upload settings that decide whether your first video gets found at all. It also covers something most setup guides skip entirely: you don't need to be on camera to start a channel that grows. A faceless channel, built from a script, a voiceover, and generated visuals, is a legitimate starting point in 2026, not a workaround for people who can't film.
How to Make a YouTube Channel, the Short Version
- 1Sign in with the Google Account you want tied to the channel, or create a new one if you'd rather keep it separate from your personal Gmail.
- 2Create the channel itself. Choose a personal channel, which uses your Google Account name, or a Brand Account, which uses whatever name you type in and can have several managers.
- 3Add a profile picture, a banner, and a short channel description so the page isn't blank the first time someone lands on it.
- 4Verify your phone number. This one step unlocks uploads longer than 15 minutes, custom thumbnails, and live streaming.
- 5Publish your first video with a real title, a written description, and a custom thumbnail, then repeat on a schedule you can actually keep.
Everything below expands on one of these five steps, plus the sizes and settings that aren't obvious until you're staring at an upload error at 11pm.
It helps to separate two things that get lumped together in most tutorials: creating the channel, which is mechanical and takes minutes, and setting the channel up to actually be found, which is a handful of decisions that compound over your first few months. Skipping straight past the second part is the most common reason a channel sits at a few dozen views per video for a year. None of the individual steps below are hard on their own. What matters is doing them in roughly this order, before the first upload rather than after, so you're not going back to fix a handle or a missing description on a channel that already has videos live.
Personal Channel or Brand Account, Which One to Pick
A personal channel is tied directly to your Google Account. Your channel name defaults to your Google name unless you change it, and only you can manage it unless you hand over your actual Google Account password, which isn't something you want to do for an editor or a co-host.
A Brand Account solves that. It's still connected to your Google Account, but it exists as its own identity with its own name, and you can add other people as managers or owners using their own Google emails, without ever sharing a password. If you plan to bring on an editor or a thumbnail designer down the line, or you simply want your channel name to be different from your real one, start with a Brand Account. It costs nothing extra and takes one additional click during setup.
One thing worth knowing before you commit: you can create more than one channel under a single Brand Account, which matters if you eventually want to run a second channel in a different niche without spinning up a second Google Account from scratch.
If you already have a personal channel and decide later that you'd rather run things under a Brand Account, you don't have to start over. YouTube lets you convert an existing channel from the advanced settings, and your subscribers, video history, and watch stats move with it. It's a one-way move, so it's worth deciding this early rather than midway through your first month of uploads, but picking wrong the first time isn't the wall it feels like at setup.
Creating a Channel on Desktop
Desktop is the better place to do this the first time, mostly because the banner cropping tool and the deeper Studio settings are easier to hit precisely with a mouse than a thumb.
- 1Go to youtube.com and sign in with the Google Account you picked earlier.
- 2Click your profile picture in the top-right corner, then open the account menu and look for "Create a channel."
- 3Pick a name and a handle, the @handle other people will use to find and tag you. Handles are first-come, so check that yours isn't already taken before you get attached to it.
- 4Decide here whether to use your personal name or switch to a Brand Account, this is the simplest point in the flow to make that call.
- 5Click Create. YouTube generates the channel and drops you straight into YouTube Studio, the dashboard where you'll manage everything going forward.
- 6Before uploading anything, click Customize Channel and add your banner, profile picture, and description while the page is still empty and low pressure.
Do this first pass on desktop even if you plan to post mostly from your phone later. Cropping a banner correctly on a 6-inch screen is a genuinely worse experience than doing it once, properly, on a laptop.
Inside Customize Channel you'll find three tabs worth knowing before you touch anything: Layout, where you set a channel trailer and arrange sections once you have enough videos to group into shelves; Branding, where the profile picture, banner, and watermark live; and Basic Info, where the channel name, description, links, and contact details go. Fill in Branding and Basic Info on day one. Layout can wait until you have three or four videos to actually organize.
Creating a Channel on the YouTube App
The main YouTube app can create a channel from a cold start, but the deeper settings live in a separate app called YouTube Studio, which is free and worth installing on day one regardless of where you plan to post from.
- 1Open the YouTube app and tap your profile icon in the top-right corner.
- 2Tap "Create a channel" if you don't already have one, or open YouTube Studio from the same menu if that option isn't showing.
- 3Confirm the name YouTube suggests, or edit it, then confirm.
- 4Add a profile picture straight from your camera roll. The app crops it to a circle automatically, so keep the subject centered rather than off to one side.
- 5Switch to the YouTube Studio app for anything past the basics, banner uploads, Brand Account switching, and phone verification are all noticeably easier there than in the main app.
Mobile is fine for day-to-day channel management once everything exists. It's the initial channel art setup where a bigger screen actually saves you time.
Once the channel exists, the Studio app is where you'll spend most of your actual time: checking view counts the morning after a video goes up, replying to early comments, and reading the audience retention graph to see exactly where viewers drop off. Turn on push notifications for comments and new subscribers in the app's settings, since catching the first hour of comments on a new video is one of the few things that meaningfully helps a video's early performance.
Channel Art Sizes You Need Before You Start
Get these ready as files on your device before you open the customization screen. Nothing here is complicated, but hunting for the right pixel dimensions mid-upload is how a ten-minute setup turns into an hour, and it's the step most people quietly abandon halfway through, coming back a week later with the channel still looking unfinished.
If you're building these from a single brand photo or logo rather than a design file, expect some manual cropping regardless of which tool you use. The banner in particular is an unusual aspect ratio that most phone photos and social graphics don't naturally fit, which is the main reason so many new channels launch with a banner that's either stretched or has the important part cut off on mobile.
| Asset | Recommended size | Notes |
|---|---|---|
| Profile picture | 800 x 800 px | Crops to a circle, keep the subject centered; JPG, PNG, GIF, or BMP under 2MB |
| Channel banner | 2560 x 1440 px | Only the center 1546 x 423 px shows on every device, keep text and logos inside that box; under 6MB |
| Video thumbnail | 1280 x 720 px | 16:9, minimum width 640px, under 2MB, needs phone verification to upload |
| Watermark | 150 x 150 px | Small logo shown in the corner during playback, optional and easy to skip at launch |
The banner is the one that trips people up, because it displays differently by device. Mobile shows just the center safe-zone strip, desktop shows a wider crop, and TV shows the full 2560 x 1440 canvas. Design for the smallest visible area first, keeping your logo and any text inside that 1546 x 423 box, then let the rest of the image extend outward as background for the larger screens.
Thumbnails matter more than any other single image on your channel, since they're what actually gets clicked in search and suggested results, and they require phone verification before YouTube lets you upload a custom one at all.
All four assets accept JPG or PNG, and none of them need to be final on day one. Swapping a banner or profile picture later doesn't reset anything, no lost subscribers, no broken links, no penalty in search, so treat the first version as good enough rather than something to agonize over before you've published a single video. The one exception is the handle, which is genuinely harder to change once people start tagging you with it.
Customizing Your Channel Before Your First Upload
Once the art is uploaded, fill in the channel description in plain language, what the channel is about and how often you post, since this is what shows up in search results and on the About tab. Add any links you want visible, a website, an Instagram, a contact email, and if you already have footage, a short channel trailer that plays automatically for people who land on your page without subscribing yet.
Phone verification deserves its own paragraph because of how much it unlocks for something that takes under a minute. Go to youtube.com/verify, confirm a phone number, and you get access to custom thumbnails, uploads longer than 15 minutes, live streaming, and the ability to appeal a restriction if one ever lands on your account. The confirmation is usually instant, though YouTube says to allow up to 24 hours for the permission to fully apply.
Two more settings are worth finding before your first upload, both tucked into Studio's general settings rather than the customization screen. Set your default upload visibility to Private so nothing accidentally goes public while you're still testing, and set a default category that matches your niche, since it feeds into how YouTube files your videos internally for recommendations. Neither one is visible to viewers, but both save a few clicks on every future upload once they're set.
The Community tab, where you can post text updates, polls, and images between videos, no longer has a subscriber requirement at all. What it needs instead is Advanced features turned on in Studio, which comes from verifying your identity, and a channel that isn't marked Made for Kids, since that setting disables posts permanently. It's a small thing to enable early, since a text update between videos is a low-effort way to stay visible on weeks you don't have a new upload ready.
Uploading Your First Video the Right Way
Your first video isn't going to be your best video, and that's fine. What matters is getting the surrounding settings right, because those are the habits you'll repeat on every upload after this one.
- Title: put your main keyword near the front and keep it under roughly 60 characters so it doesn't get cut off in search results.
- Description: the first two lines show before the "more" cutoff, so lead with what the video actually delivers, not a generic intro paragraph.
- Custom thumbnail: 1280 x 720, high contrast, legible at phone size. A thumbnail resizer will fit any image to the exact spec in one pass if you're starting from a photo that isn't already cropped.
- Tags: a handful of specific tags help YouTube understand context, though they matter far less than the title and thumbnail. A tag generator saves the guesswork if you're not sure what to type.
- Hashtags: up to three in the description show above the title on the watch page, useful for topic and format discovery. A hashtag generator exists for exactly this if you want more than the three obvious ones.
- Playlist: add every video to at least one playlist from day one. Playlists are one of the few places YouTube recommends your older videos alongside your newest.
- Category: pick the category that actually matches the content, not the broadest one available. It's a quiet signal YouTube uses alongside your title and description to decide who to show the video to.
- Captions: upload or auto-generate captions before publishing rather than after. A meaningful share of viewing happens muted, and accurate captions also give YouTube more text to index for search.
- Visibility and schedule: set a specific publish time instead of uploading and immediately going public. A scheduled premiere gives you a window to double-check everything before it's live to anyone.
Don't overthink the first video. Treat it as the first data point you'll have on your own channel, not the one that has to carry the whole thing.
Once you have two or three videos live, come back and add end screens and cards, the clickable elements that point viewers to another video or a subscribe button in the last 5 to 20 seconds. They don't matter on video one, since there's nothing yet to point people toward, but skipping them permanently is a common way channels leave easy watch-time on the table once they do have a small library.
You Don't Have to Be on Camera to Start
A faceless channel runs on a script, a voiceover, and visuals, stock footage, generated images, or animated clips, with no host ever appearing on screen. There's no filming schedule, no lighting setup, and no getting used to hearing your own voice back. For a lot of people, that single change is the difference between starting this week and starting never. If you want the deeper walkthrough, we've written a full guide on how to start a faceless channel, and a separate list of faceless channel ideas if you haven't picked a niche yet.
It also solves the consistency problem that ends most new channels before they get anywhere. Filming, even a simple talking-head video, takes a set, decent lighting, and enough energy on camera to look watchable, which is hard to keep up three times a week around a full-time job. A script-and-voiceover format compresses that down to writing time and render time, no outfit, no room to clean up, no retakes because you stumbled on a line. That's less a shortcut than a different set of tradeoffs, better suited to explainer, story, and list-style content than to anything that depends on your specific face or personality being the draw.
The fastest way to test whether a topic and format actually work is to make one video and watch how it performs before committing to gear or a recurring on-camera identity. Our free video maker turns a single topic into a finished, captioned voiceover video, script, voice, visuals, and captions handled in one pass, with one free video a day so you can try the format before deciding it's worth building a whole channel around. If you outgrow the free tier later, the paid options are listed on the pricing page.
Mistakes That Slow a New Channel Down
- Publishing one video with no plan for a second. A channel that posts once and goes quiet for two months sends a weaker signal than a smaller channel posting consistently.
- Leaving the banner and profile picture blank. An empty channel page reads as inactive, sometimes even as spam, to a first-time visitor deciding whether to subscribe.
- Keeping the auto-generated handle. A string of random characters looks unclaimed and makes your channel harder to search for and tag correctly.
- Skipping the custom thumbnail on early videos. YouTube's auto-generated frame is rarely the most compelling still in the whole video, and click-through rate is one of the strongest early signals a new channel has.
- Never verifying the phone number. It quietly blocks custom thumbnails and any upload past 15 minutes, and plenty of new creators don't notice until they hit the wall.
- Trying every niche at once instead of picking one lane long enough to learn what actually pulls views for that specific audience.
- Writing a title after the video is already exported. The title, thumbnail, and first line of the video work as one unit, and bolting a title on at the last minute usually shows.
- Comparing week-one numbers to a channel that's been posting for two years. Nearly every channel that eventually works looks slow for the first several months, and treating that normal stretch as a signal to quit is the single most common reason channels never get past it.
Frequently asked questions
Yes. Creating a channel, uploading videos, and using YouTube Studio are all free, whether you choose a personal channel or a Brand Account. The only costs involved are anything you spend on your own equipment, editing tools, or a video-making service, none of which YouTube requires.
Ship your first faceless video today.
Pick your niche. Pick your models. We render. From idea to finished short in under 7 minutes — no camera, no editor.
Keep reading
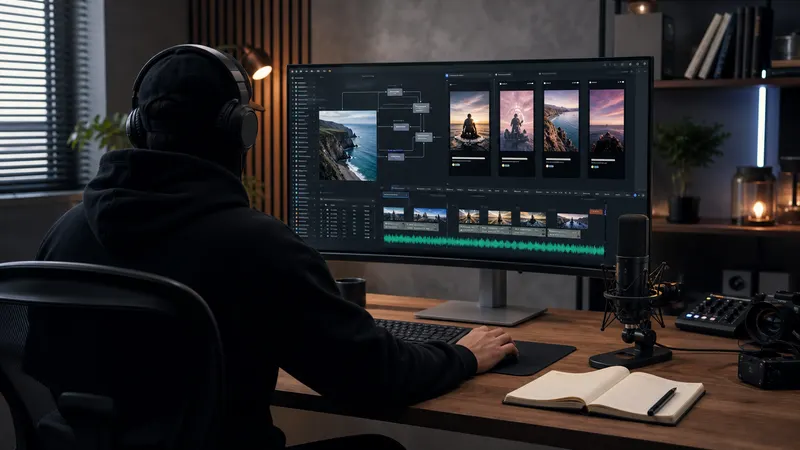
How to Start a Faceless Channel in 2026: Complete Guide
A practical, cross-platform system for turning one clear channel idea into original YouTube videos, Shorts, faceless Reels, and TikToks without appearing on camera.
27 Faceless YouTube Channel Ideas Ranked by RPM in 2026
AI finance explainers pull $18-32 RPM in 2026 while dark history docs average $12-25 — here are the 27 niches worth building a channel around, ranked and scored.
How to Monetize YouTube Shorts in 2026: Real RPM Numbers
Most "YouTube Shorts monetization" guides skip the math entirely. This one has the actual RPM range by niche — $0.02 to $0.45 per 1,000 views — and the exact path faceless operators used to clear their first $1K.